Showing posts with label Breads. Show all posts

Thursday, March 7, 2019

Twisty Sugar Bread

We need some breakfast item so I baked twisty sugar bread. I think I over loaded them in the pan...lol.🤭 These are soft with a crusty top and slightly sweet. I doubled the recipe since we have a few bread eaters. Thank you Mei S. for sharing recipe.


Since I doubled recipe, I adjusted recipe a little bit. Recipe adapted from Mei S.

Ingredients:

290 ml whole milk
65 g condensed milk
80 g sugar (use 90 for sweeter)
1 large egg
1/4 tsp salt
70 g soften butter
1.5 tsp instant yeast
500 g bread flour
40 g cake flour

Egg wash
1 egg white + 1 tbsp milk

Instructions:

1. Heat milk in microwave for 30 seconds until warm.

2. Mix in mixing bowl, warm milk, sugar, condensed milk, egg, salt, and yeast. Lightly whisk the together.

3. Sift bread and cake flour together. Add half to liquid ingredients.  Stir until mix. Then add in rest of flour. Place on Kitchen Aid mixer to knead into dough using #2 for 5 mins ( If no KA then hand knead.)

4. Add in soften butter and knead to window panel. Mine took about 15 mins. Roll into ball. Cover and rest in oven with light on for 1-2 hrs until double. (Mine took 1 hr 40 mins since it's pretty cold here.)

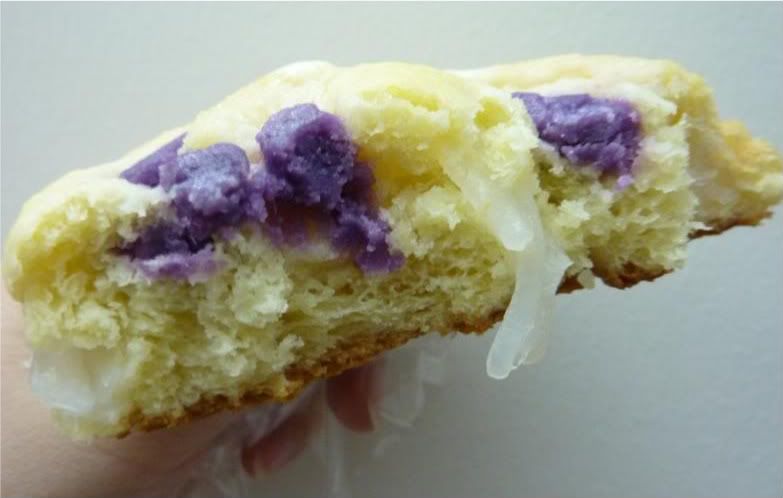
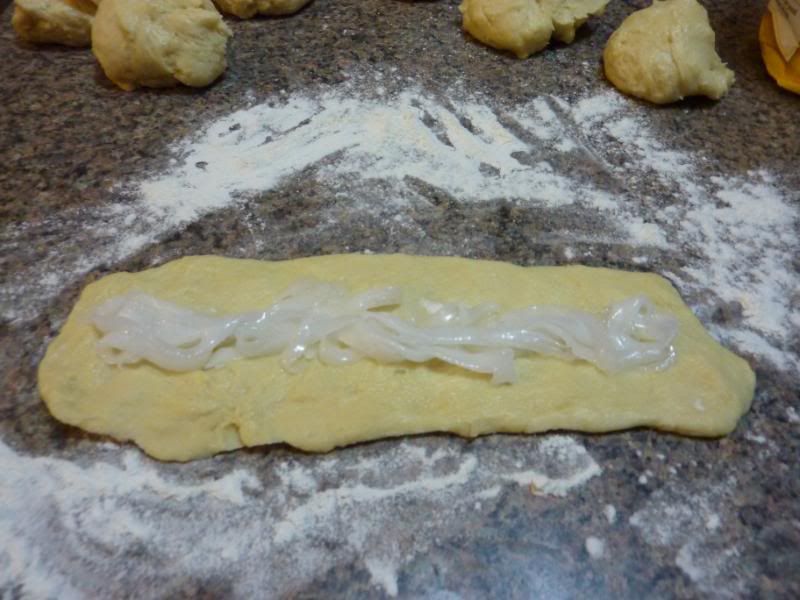
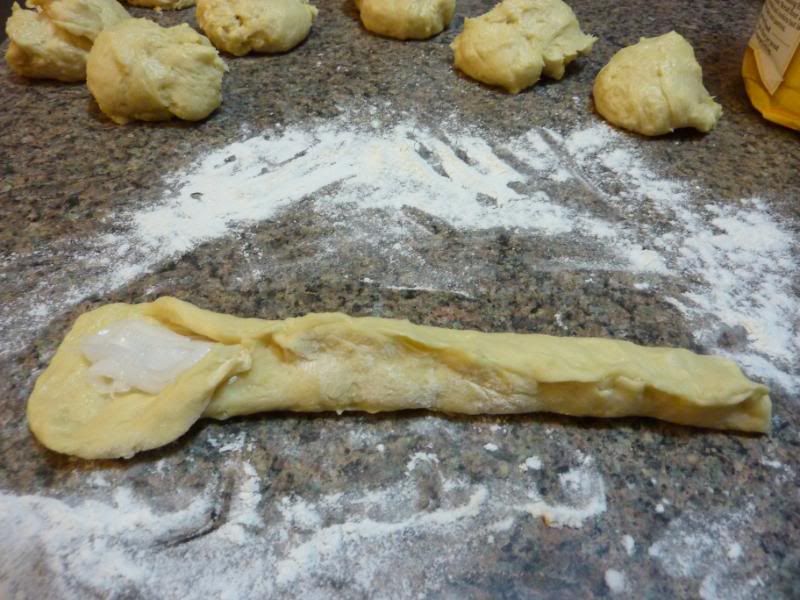
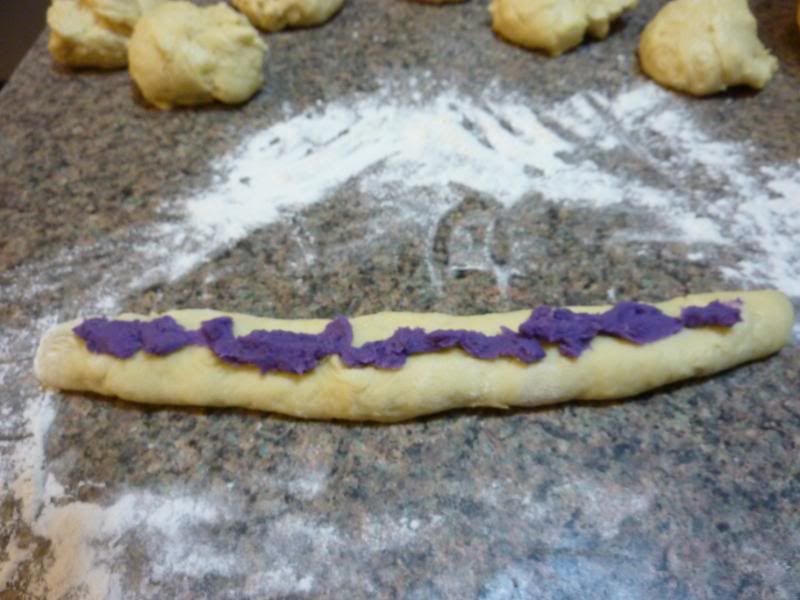
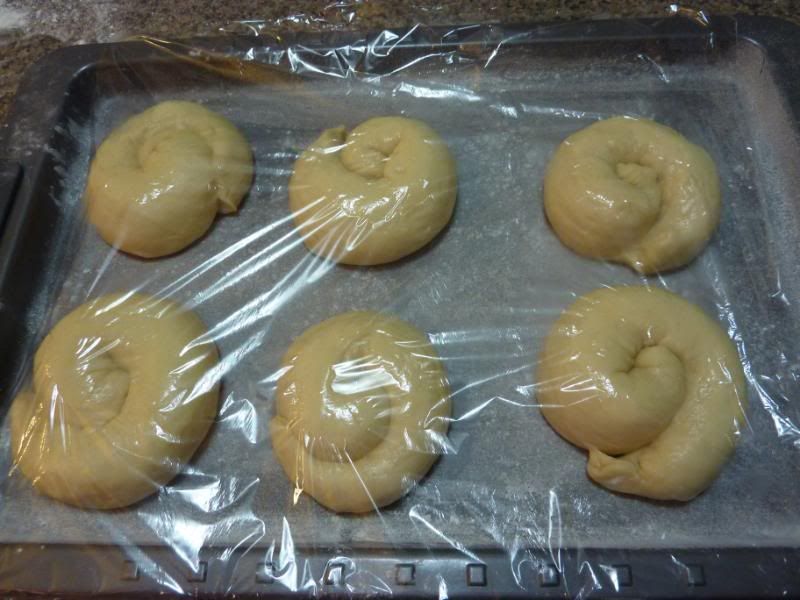
5. After doubled, knead dough and divide into 65 g each. Roll into round balls. Cover with damp cloth to prevent drying.

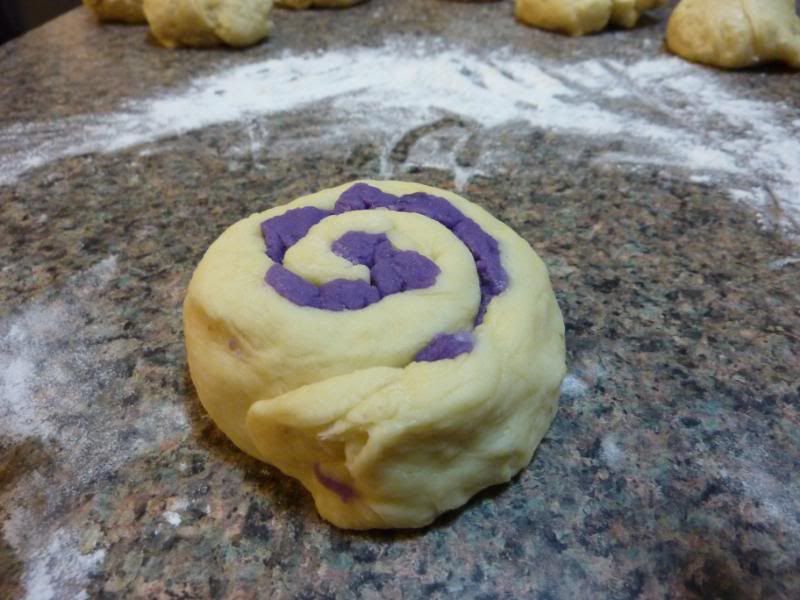
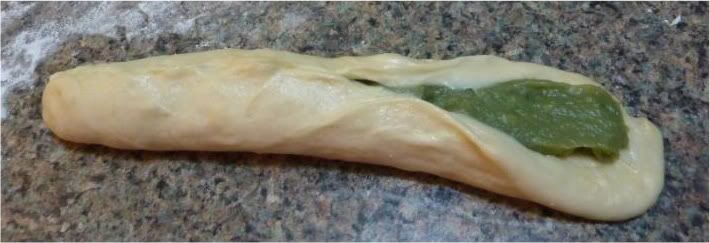
5. Roll into a long 12 inch rope. Fold and twist. Place into baking pan. Continue with rest of dough.

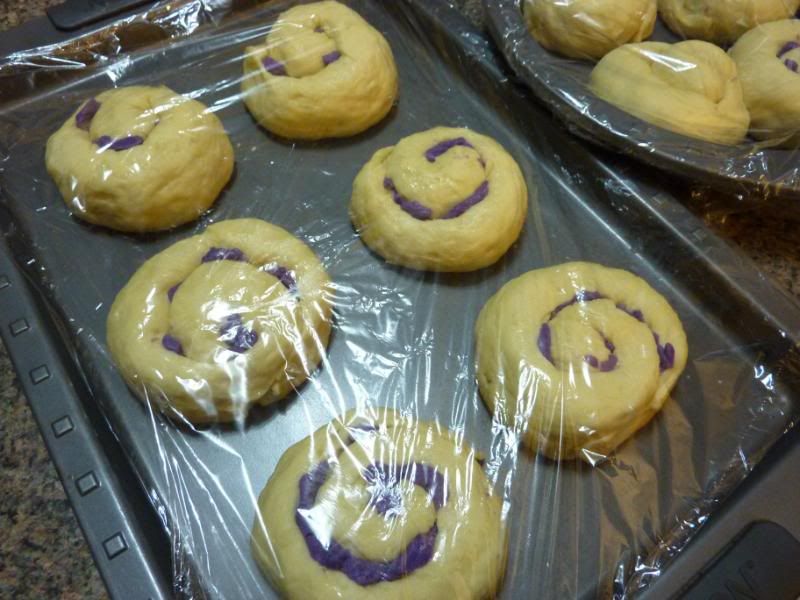
6. Cover twisted dough with damp towel.  Rest until double about 1 hr.

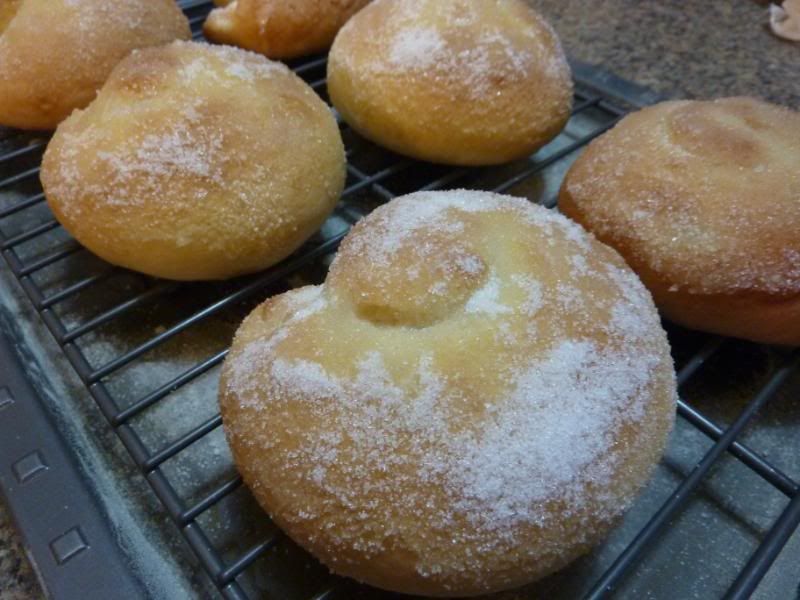
7. Preheat oven to 350F.

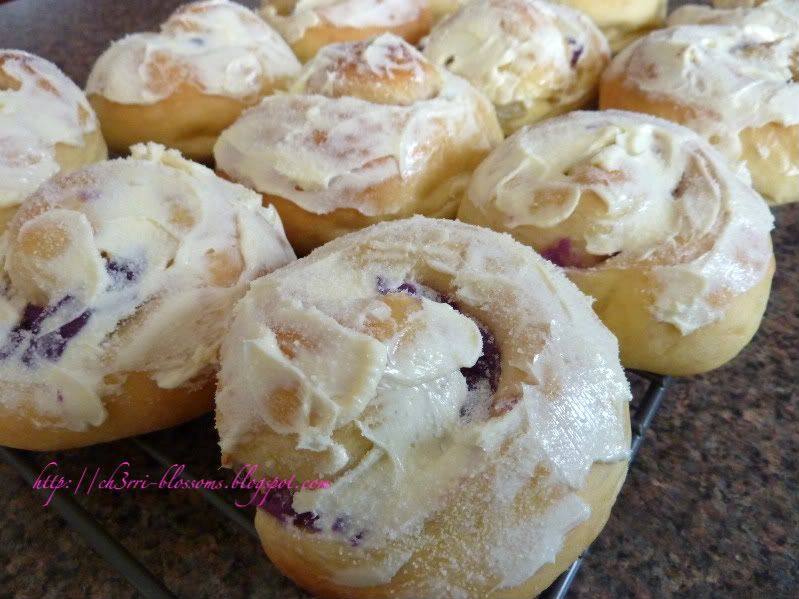
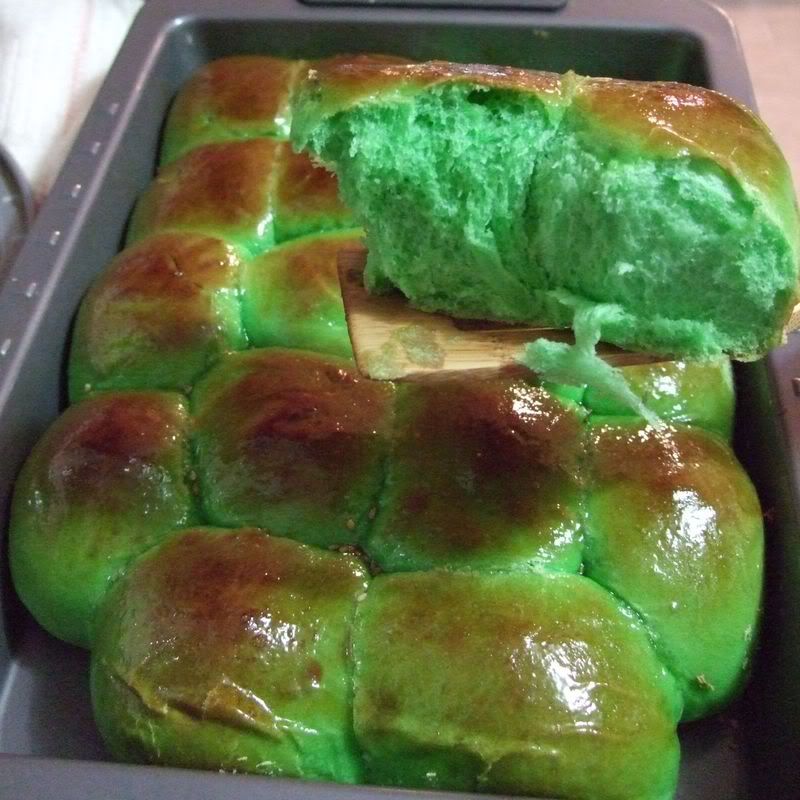
8. Brush egg wash and sprinkle sugar on top of dough. I used some cane sugar for a more crunchy feel.

9. Bake in middle rack for 18-22 minutes until golden.

10. Cool on cooling rack.

Enjoy!


Wednesday, February 20, 2019

Ham and Cheese Buns

No more bread for breakfast so here is my late night baking for kids. Ham and cheese buns. Didn't really know how to roll these so they can look pretty and not melting all over.  Lucky these shredded cheddar and monterey jack cheese not melting everywhere. The cheese also gives the chewy melting texture which is delicious! 🤗

Dough recipe from thewoksoflife


Monday, March 29, 2010

Macapuno Ube Ensaymada

This is such a delicious bread. My husband and I love to eat them! He asked me to make them again and again. But I need to stop since these are pretty fattening. I can only eat this once a month....lol. Thanks to Manang for sharing this recipe. I only make half the recipe each time since it usually takes us 3 days to finish them. I usually wrap each bread in a sandwich bag and eat them each day.:)


Here is the link to the recipe: Supersoft Ensaymada
I used macapuno and ube paste as fillings for these bread. After the bread is cooled I used whipped butter and sprinkle with sugar.

Please follow the instruction and not be like me.....:)
I realized that I didn't follow directions...lol. I forgot to divide the flour into 3. I poured all the liquid into the flour and started mixing it with my chopsticks, then I realized why the dough is so hard...lol. Then I went back and read the directions..lol. Oops. So I went and melt the butter and add in the egg and 2 egg yolks. Then mix everything together and leave it to let it rise for 2 hours. Then I beat it down and let it refrigerate for just another hour...hehehe

Thursday, January 21, 2010

Ensaymada Bread

Thanks to Manang I can finally make my own ensaymada. I think this is a Philippines bread. The Korean store sell these breads and it cost like $2 for one. The one at the store is pretty good but kind of hard. It is always better to make your own. So hot off the oven and so soft when it's still warm. You can also add your own fillings. I made a mung bean filling for mine. I will try to make the super soft ensaymada with potato for the extra soft texture. I will try to add coconut and yam as fillings next time. Mmmm......

If you look at my recipe and method you can see I'm being lazy compared to Manang. I cut out a lot of steps since I was lazy....hehehe


Here is the similar recipe from Manang which I used my bread maker to knead the dough for me. This recipe makes 12 ensaymada. So if you think you can not finish this in one or two days then cut the recipe in half.

6 cups all purpose flour
3/4 cup sugar + 1 tbsp
2 envelopes FLEISCHMANN'S Instant Yeast
1-1/2 teaspoons salt

1 cup milk ( I added couple tbsp of milk powder)
1/2 cup water
1/2 cup butter or margarine
1 large egg
3 egg yolks


Topping:
Softened butter at room temperature
Granulated sugar
grated white cheese (optional)

Method:

1. Heat the milk, water, and butter until warm and butter melted. Add in the sugar and stir well. Pour this warm but not hot liquid to the bread maker.
2. Add in the eggs to the bread maker. Then add in the flour and salt. Now close the bread maker and select for dough which it will only help you knead and prove the dough.
3. After the bread maker finish kneading the dough, take the dough out and cover it and let it prove for couple hours (4 hrs) or overnight until the dough double.
4. Now you can make your own fillings. The bread is still good without a filling.
5. When the dough is ready, divide it into 12. Using your hands, try to roll the dough out (see pic below) and add in your filling. Use some flour for dusting to prevent sticking to hands.
6. Dust your baking pan with some flour. Make the coil and then let the dough rest on the baking pan for another 20-30 minutes. Cover the dough when letting it rest (see pic below).
7. Heat the oven 350 F. Bake the dough for 15-20 minutes until golden. Remove from heat and let it cool on a rack to prevent bottom from sweating.
8. When the bread is just warm you can now spread it with butter. You will notice if the bread is too hot then the butter will melt away. So only spread when it's warm. After spreading with butter then dip the bread in the sugar. Or you can sprinkle the sugar all over the bread.
9. Serve warm or on the same day if you want that soft texture. The bread will be harder the next day or two but still good. I put the left over in individual sandwich bag to store for the next day.


Tuesday, January 19, 2010

Hollow Breads (Banh Tieu)

Here is one of my favorite snack! Banh Tieu is a Vietnamese snack. It should be round, slightly sweet and crunchy with a hollow center. I call this a hollow bread since I used bread flour to make this. And it does taste like fried bread...lol. I like mine sweeter so I added more sugar to my recipe. Sweeter does taste better...hehehe. I can eat this for a couple days. I usually just put the left over in the oven to heat up and it'll be crunchy again. Yum Yum...


Ingredients:

290 g bread flour (2 cups)
150 ml water
100 g sugar (about 1/2 cup, add another tbsp for sweeter)
1/2 tsp salt
2 tsp instant yeast
2 tsp baking powder
Sesame seeds

1. Take 50 ml water and microwave for 20 seconds or until the water is warm. Add in 1 tbsp sugar and the instant yeast. Let the yeast double or bubble up. Should just be a couple minutes.
2. Mix the left over sugar with 100 ml and stir until the sugar dissolve.
3. Mix the baking powder with the flour and salt. Then mix in the sugar water and then yeast water. Knead into a soft dough. If it's too dry then add in just a little bit more water.
4. Cover and let the dough rest for at least couple hours (3-4 hrs) or overnight until the dough double or triple in size. If you want it to prove faster, put it in the oven with the oven light on. Remember you must cover the dough.
5. Take the dough out and knead for one minute. Then divide the dough into 10 balls. The balls should be a little larger than a extra large egg. (Cover those that is not being used.)
6. Dip the ball in the sesame seeds on both sides. Then coat with some extra flour and roll the balls into flat circles. The flatness should be less than 1/2 inch. If your circles are thicker then you'll have a thicker filling. If it's too thin then you'll have nothing in the middle.
7. Heat a frying pan with enough oil to fry. Slide the flat dough into the oil and it will start to float. Gently try to push it with your chopstick and it should puff up. After it puff up then flip to fry the other side. Fry until golden. Frying should be quick so don't leave it alone or it'll be black!

Note: The longer you prove the dough the easier it will puff. Try to wiggle the flat dough when frying in hot oil. This will helps it puff.


Monday, January 12, 2009

Fried Pork Buns

My brother is going back to PennState so I made him fried pork buns. Too bad he said he have to much food already so in the freezer these go. Still good after frozen. Just microwave and still tastes great!


Dough:
  • 1 tablespoon active dry yeast
  • 4 cups all-purpose flour
  • 2 cup self-rising flour
  • 2 1/2 cup warm water
  • 3/4 cup sugar
  • 1/4 teaspoon salt
  • 2 tablespoons white sugar
  • 2 tablespoon vegetable oil
  • 1 teaspoon baking powder

DIRECTIONS

  1. Mix together yeast, 2 tbsp sugar, 1 cup flour, and 1 cup warm water. Allow to stand for 30 minutes until double.
  2. Mix 1 1/2 cup warm water, flour, salt, 3/4 cup sugar. Knead until dough surface is smooth and elastic. Add in the oil and knead again. Roll over in a greased bowl, and let stand until triple in size, about 2 1/2 to 3 hours. Punch down and let it stand for another hour. (overnight is better)
  3. Divide dough into 2 parts and divide each half into 12 parts. Shape each part into a ball with smooth surface up. keep the dough cover until use.
Fillings:

2 lbs ground pork
1/2 medium onion diced
5 dried shiitake mushrooms soaked and boiled then diced
2 cup cabbage chopped and squeeze water out
Couple pieces black fungus soaked and chopped
1 bundle transparent vermicelli (soaked in warm water, chop to 2 inches)
2 stalk green onion chopped
6 eggs (boiled and cut into 4 pieces each)
3 Chinese sausage (cut into 24 pieces)

2-3 pieces garlic chopped
2 tbsp oyster sauce
2 tbsp fish sauce
2 tbsp sugar
1/2 tsp ground pepper
2 tbsp oil
5 tbsp water
1 1/2 tsp salt

Method:


1. Mix the seasoning with ground pork and mix well. Mix until the meat is somewhat elastic. Now mix in the rest of the ingredients (leave out the egg and sausage). Mix well and taste. Best way to know if your meat is season well or not is to fry a piece and taste.

2. Now take a piece of dough and flatten with a roller. Remember to use some flour to prevent sticking to hand and roller.

3. Scoop some meat onto dough and add a piece of egg and sausage. Form your bun and put it on a piece of cut wax paper. Remember to have this cover while you work on more buns.

4. Add 2-3 tbsp vinegar to the water and heat it up. Steam the buns for 20 minutes for larger buns.

5. After buns are steamed, now heat a pan with some oil and fry the buns. Turn the buns to get all sides golden brown. (Remember to remove the wax paper before frying.)


Friday, October 31, 2008

Pandan Buns


Basic Dough:

2 3/4 cup bread flour
1 cup cake flour (3/4 all purpose flour + 1/4 cup of corn starch)
1 tsp. salt
1/3 cup butter
1 egg

200 ml cold water
1 tsp. pandan paste (optional if you don’t want pandan flavor)
2 Tbsp. milk powder
3/4 cup sugar

20 ml warm water (cold water microwave for 10 seconds)
1 Tbsp. instant yeast
1 tsp. sugar

Egg Wash: 1 egg + 1 tsp water (beat until bubble formed)

Honey wash: 1 tsp honey + 1 tsp maple syrup + 1 tsp water (mix well)


Method:

1. Add bread flour, cake flour, salt, butter, and egg together. Best to leave butter at room temperature and then using hand to mash the butter with the flour. Then add in the egg and stir together.

2. Mix warm water, yeast, and sugar together and wait 5 minutes for yeast to active (bubble).

3. Mix cold water with milk powder, sugar, and pandan paste. Stir until sugar kind of dissolved. Pour into flour mixture and mix well. Add in the yeast mixture.

4. Knead the dough until it is smooth, for at least 15 minutes. If the dough is too wet, add a little of bread flour.

5. Cover the dough and let it rest in the oven with the light on for it to double in size (at least 2 hrs). Take the dough out give it a few knead.

6. Take the dough and divide it into 12 balls. Place the balls into a baking pan and cover. Let it rest until the balls double in sizes. It will be faster if you let it sit in the oven with lights on. Use a non-stick pan.

7. When the dough is ready, pre-heat your oven at 350 F. Brush egg wash on dough and bake the dough for 20-25 minutes or until the golden brown on top. When warm from the oven, brush the top with some honey/maple syrup (like my picture above) to give it some shine.

8. Serve warm. Covered buns can be kept in refrigerator for 5 days. Just microwave for 20 seconds before serving and it will be soft again.

Note: do not melt the butter as it will add more liquid, which will cause the dough to be wet.