Thursday, April 25, 2019

Instant Pot Flan 6 oz Cups

Made the smoothest flan with instant pot today! The trick is no direct water pressure on the cups. I used to just place the trivet and even placing towel on top then place flan cups on the towel. However, I still get a lot of bubbles.  So I thought maybe if I put something else higher with holes then it might solve the problem. And it did! I used a steamer basket and flipped it upside down...lol


Steamer basket flipped over on top of trivet.  In 8qt IP


Custard glass cups 6 oz


Need 8- 6oz molds: I used custard glass cups

Caramel

3/4 cup sugar
1/4 cup +2 tbsp water

Cook sugar and water until caramelized. Divide into 8 molds.

Custard: (can use large eggs, reduce milk to 2 1/2 cup)

3 cups whole milk
3 whole eggs jumbo (200g total)
3 egg jumbo yolks  (125g total)
1/2 cup sugar
1 tsp vanilla or rum

Boil milk until hot. While milk cooking, place eggs, yolks, sugar, and vanilla in a large bowl. Lightly whisk until mixture combined.

Now slowly add in the hot milk while whisking egg mixture. Mix until combined.

Strain mixture over a fine mesh strainer 3 times.

Prepare instant pot with trivet, flip steamer upside down on trivet. Add in 1 1/2 cup hot water.

Pour custard solution in caramel molds. Wrap with aluminum foil.

Will need to do in 2-3 batches since can't fit all in the pot.

Place molds on top of flipped steamer basket. Set manual pressure on LOW for 2 minutes. Then wait more 4 minutes L 00:04 and do quick release to remove all steam. Remove flan out of instant pot and repeat. Remove aluminum foil once out of pot. Add more water to pot each time.

Cool and refrigerate until serving.

Enjoy!


Wednesday, April 24, 2019

Wife Cake/Lao Po Bing 老婆饼

I really love this pastry as this is my third time making this week! The first two times I gave most away to mom, aunts, sister in law, and friends. I feel I didn't eat enough so I made it again. I increased the filling and substituted maltose with sugar instead. The result is just so satisfying and yummy! Hope you're not bored with my wife cake. If you like more filling then you'll like these. 😋😋😋


Makes 16 cakes 
Recipe adapted from Chef Zhu Limi Foodvideo

Water Dough:

215g all purpose flour
2 tbsp sugar
60g lard
110g hot water (used boiling hot)

Use flour make a well, place lard and sugar in center. Slowly add in the hot water and stir everything together.  Hot water helps melt sugar and lard into flour. Then knead dough until elastic. Use rub and pull method to make dough elastic. Do this until dough almost cool. Throw dough on counter a couple times to help develop gluten. Cover it and rest for about 20 minutes. Divide into 16 pieces about 25g. Must cover with plastic wrap all time.

Oil Dough:

120g all purpose flour
60g lard

Use hand knead flour and lard into dough. Cover and set aside. Divide into 16 pieces about 11g. 

Filling:

130g fried glutinous rice flour gaofun
35g sugar (more sugar for sweeter 45-50g)
130g hot water (add 1-2 tbsp if dry)
20g oil
40g sesame seeds (lightly roast on pan)
30g desiccated coconut
175g candied winter melon


1. In a bowl place fried glutinous rice flour with sugar and add in hot water. Stir to form a rough dough.

2. Place most candied melon in food processor leaving a few pieces out to hand chop. Blend the candied melon finely but not paste. Roughly hand chop the few pieces for crunchy texture.

3. Add in oil, sesame seeds, desiccated coconut and all the candied melon to glutinous rice mixture. Wear glove and mix all ingredients together.

4. Divide into 16 pieces each about 35g.

Assemble: 1 egg for egg wash and sesame seeds

1. Use water dough and wrap the oil dough. Flatten. Roll it thin and evenly into an oblong shape like pictures above. Then roll it up from long side to the other end. Repeat one more time. Rolling it will give layers for crust. Repeat until finished with all dough. Must keep them cover to prevent drying. 

2. Bend the two ends to center and then flatten to roll it into flat circle to wrap filling. (Flip dough over to wrap uglier side in.)Then use rolling pin to flatten roll into flat round shape about 9 cm.

3. Use sharp knife to cut 2 lines in center all the way through. Brush with egg wash (1 egg beaten).  Add some sesame seeds for decoration.

4. Bake in preheated oven at 390F or 200C for about 20 minutes until golden.

5. Let cool before serving. Extremely crispy crumbly when hot!

Enjoy!

 Yummy filling!

Thursday, April 18, 2019

Steamed Pork Buns

Need to make something easy for kids to eat for breakfast and afternoon snacks. So I make their favorite mini steamed pork buns just the right size for breakfast. These must be very good seeing my youngest eating one after another! I have to tell him no more!🤣


 Measure out meat and place sweet suasages on top
Youngest trying to steal another bun! He's testing to see which one still warm🤣


Prepare fillings and cut parchment paper ahead of time. Dough can easily overproof if not fast enough. Overproof dough will give darker color and lumpy skin.

Filling:

545g ground pork
2 tsp soy sauce
2 tsp oyster sauce
1/4 tsp salt
1/8 tsp ground pepper
2 tsp sugar
1 tsp sesame oil
2 tsp vegetable oil

100 g chopped onion
2 stalks chopped scallions
1 tsp shaoxing rice wine
1 tsp chicken powder
1 tsp tapioca starch/cornstarch
4 tbsp water

Sweet Chinese sausages 


Mix all seasonings together with pork except for water and sausages. Stirring within one direction until well combined and slowly add in water.  Continue to stir until meat absorbed all water. Divide meat into 25 pieces about 30 g each. Place chopped suasages on top. Cover and refrigerate.

For dough: makes 25 buns.

450 g all purpose flour
50 g cornstarch
180 g warm water
70 g whole milk
60 g sugar
1 1/2 tsp yeast
40 g vegetable oil

1. Mix yeast with some warm water and 1 tsp sugar for about 5 minutes until foamy.

2. Mix all ingredients into electric mixer to knead dough for 12 minutes until smooth and elastic. Easier if use paddle first to form dough then use hook to knead dough on speed #2 (Add more flour if too wet, more milk if too dry)

3. Cover and rest dough for 10 minutes.

4. Knead dough and divide into 25 pieces about 35g each. Knead into round balls. Must cover dough with moist cloth to prevent drying.

5. After kneading all into round balls, then roll first dough into wrapper about 10 cm circle. (Easier to roll if add flour to surface.)

6. Place meat filling into wrapper and pleat into bun. Repeat until done. Rest buns for 15-20 minutes. (Best divide into 2 batches for steaming. So after finishing one tray, time it. Then work on rest of buns. Time up then steam first tray.)


7. Bring water in steamer to boil.  Add in 1 soup spoon vinegar.  Steam buns for 12-15 minutes. (Open lid after 5 minutes to remove liquid on lid. Then cover back)

Enjoy!

Limoncello Italian Cake

A good friend told me how she tried a delicious limoncello cake given to her by a friend in NY. I was only able to locate a frozen cake which tastes very light and refreshing.  So I decided to make one.😁

The cake is a honey lemon sponge cake. The cream is made with mascarpone, cream cheese, and lemon curd.  Limoncello liqueur is added to sugar syrup and brushed on cake. The flowers is chantyflex cream with lemon curd. Adding lemon curd to chantyflex cream tastes so much better!

Family loves the cake even my daughter who told me she doesn't like lemon cake loves it. 😋😋😋


Piping the mascarpone cream to layers of cakes


Cooling cake

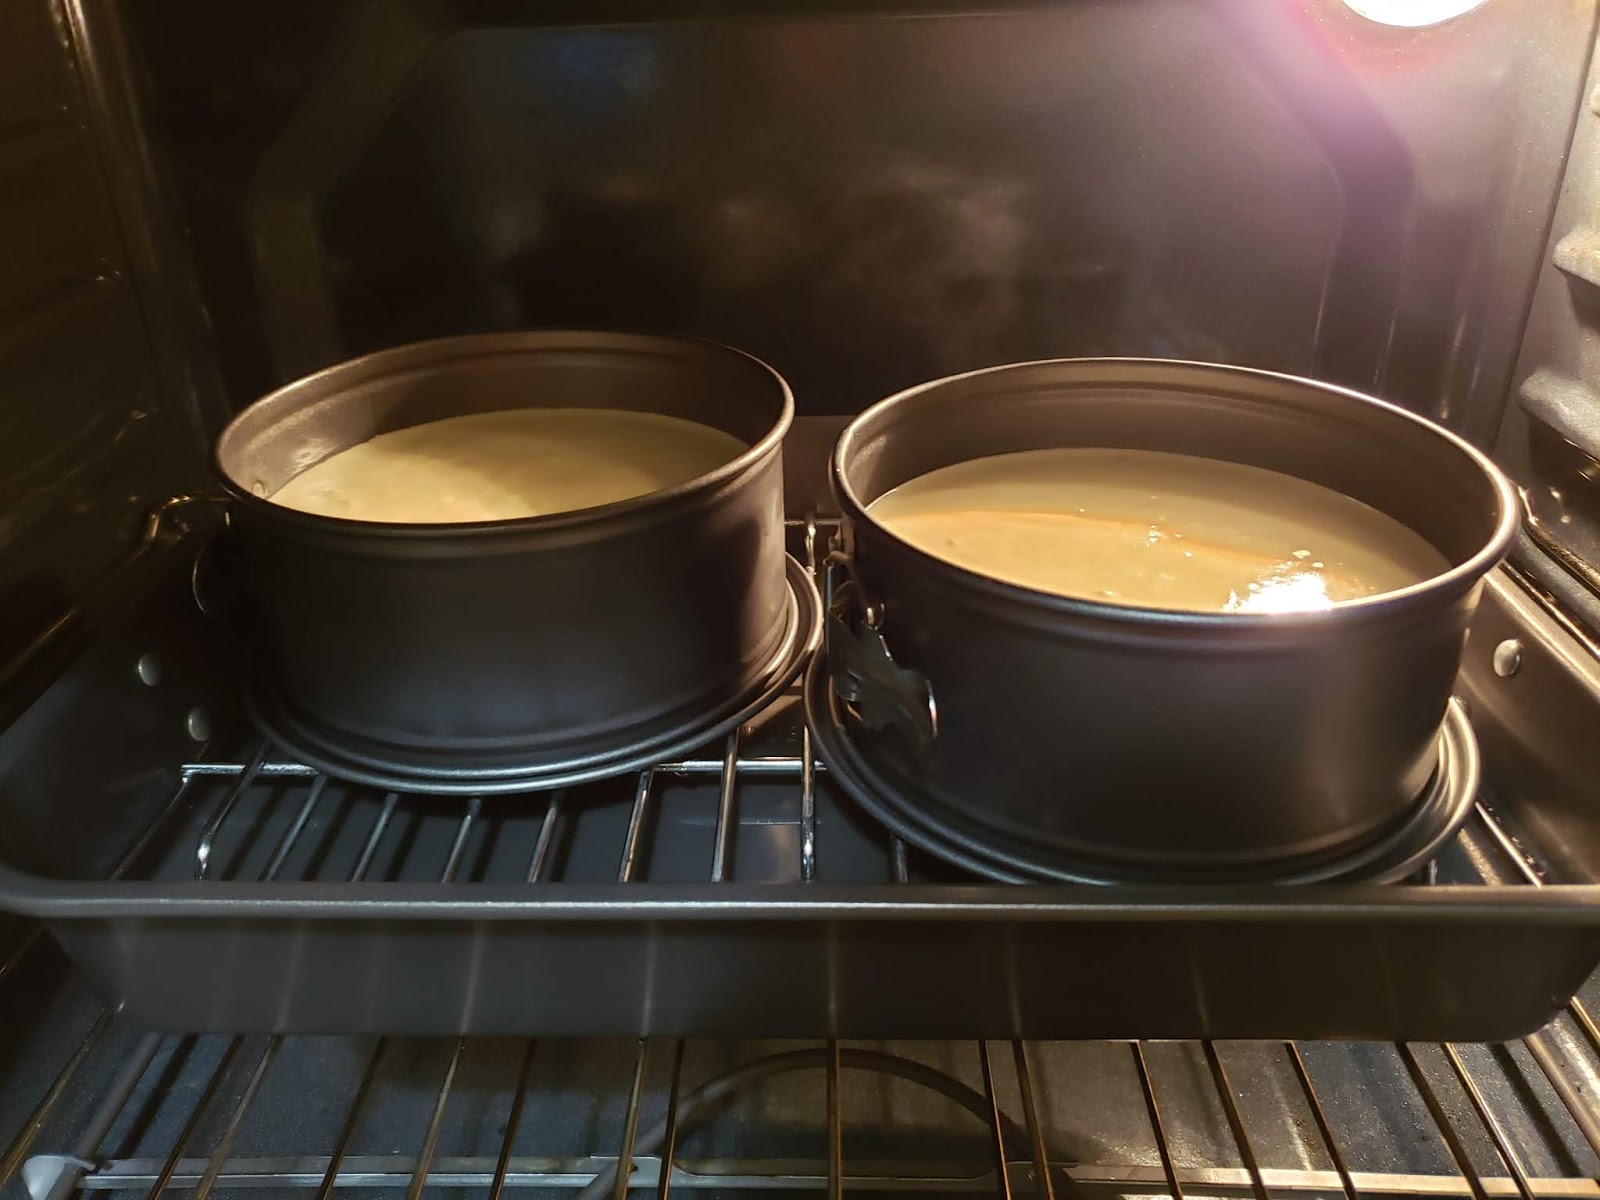
Steam bath method with pans inside pan on a rack and hot water


There are multiple steps for this cake.

1. Lemon Curd: recipe from ➡️ numstheword. Not sure what happened and I only used the yolks. Turns out delicious. Might want to halve the recipe since only small amount needed. Curd last 2 weeks in refrigerator.

5 large yolks
3 lemon zest
3/4 cup lemon juice
1 1/4 cup sugar
Pinch salt
1 1/2 stick butter =12 tbsp

In a sauce pan add in yolks, zest, juice, sugar, salt and whisk until smooth. Place on stove and cook for 15 minutes medium heat until thicken. Whisking the whole time to prevent burning.

After 15 mintues remove from heat. Add in 1-2 tbsp butter at a time with each time whisk until smooth.  Repeat until all butter mixed in.

Strain the curd with a fine mesh strainer to remove zest. Leave to cool, cover and refrigerate. Chill for 3 hours or overnight.

2. Honey Lemon Sponge: adapted from Barry A. since my eggs are jumbo, I need to weigh them out.

5 large yolks (82g)
75 g sugar
50 g lemon juice
78 g milk
95 g canola oil
1 Tbsp honey
1 tsp vanilla
1 lemon zest about 1.5 tsp
160 g cake flour

Merginue
5 large egg white (162 g)
75 g sugar
1/4 tsp cream tarter or 1 tsp lemon juice

2-7 inch pans lined with parchment paper on bottom. No grease on side. (Can use 8x3 inch round and divide cake into 2-3 layers after baking, however, you might need more cream to frost)

Preheat oven 150C (305F). Prepare a large pan and rack for steam bath. Boil hot water to pour in pan. See picture ⬆️.

Instructions:

1. Whisk yolks, sugar and milk together.  Then add in oil, honey, vanilla, and then lemon juice. (Must do in this order since milk curdle with lemon juice. You can replace milk with water if you want. Lemon juice with milk makes a white cake! Can strain mixture if lumpy.)

2. Whisk in flour until smooth batter. Set aside.

3. In an oil free bowl, whip eggwhite to frothy. Add in cream tarter and continue to whip until foamy. Slowly add in sugar. Whip until stiff peak.

4. Fold merginue into yolk batter with 1/3 merginue each time. Gently fold to prevent deflating merginue.

5. Divide batter into 2- 7 inch pans. Place pans on top of prepared pan and rack. Pour hot water into large pan almost reaching rack.

6. Bake at 150C (305F) preheated oven for 55-60 minutes.

7. After baking, take pans out and drop on counter 2 times. Then flip over to cool for 10 minutes before removing cake out of pan.  Peel of parchment paper and let cakes cool on rack.

8. Wrap cooled cakes with food wrap until ready to use. (I didn't have time so frost the next day is fine)
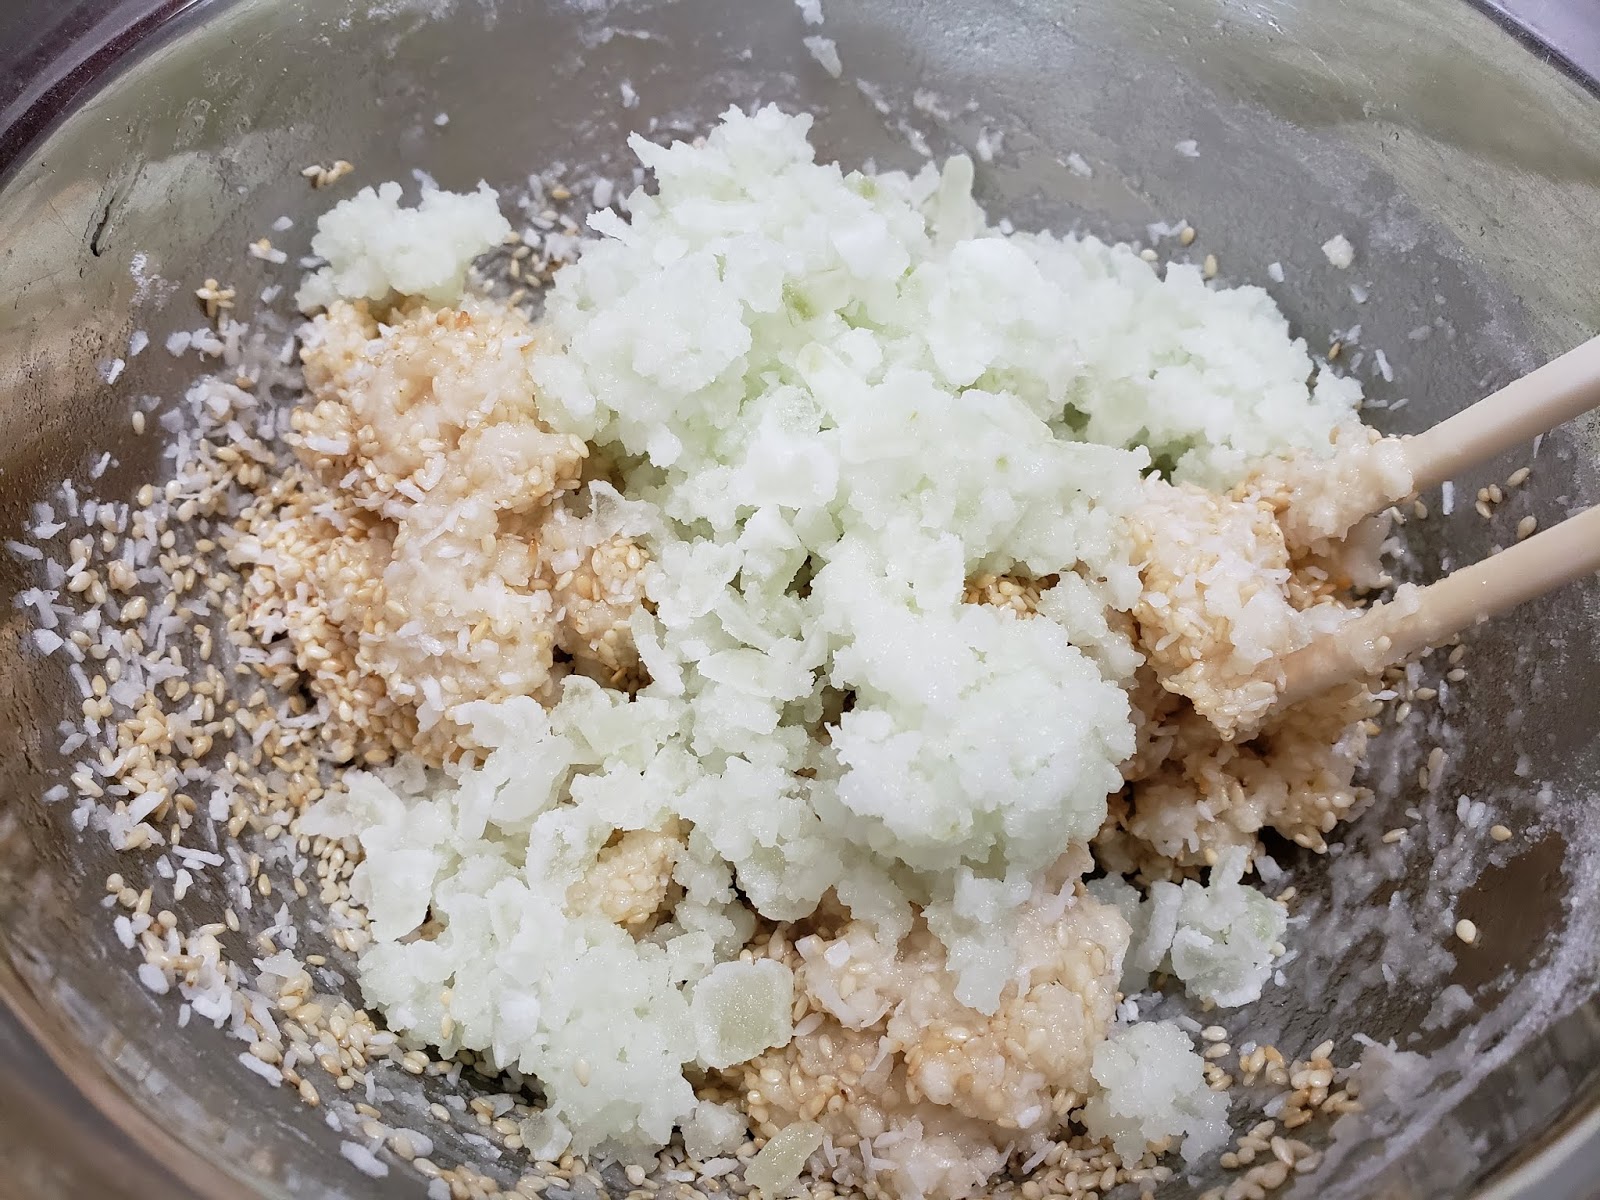
Mascarpone Cream

8 oz mascarpone cheese
4 oz cream cheese
1/2 cup powder sugar
1 tbsp limoncello (or some lemon juice)
1 tsp vanilla
1/2-1 tsp lemon zest
1/4 cup + 1 tbsp lemon curd
2 drops of yellow (optional)

1 cup heavy whipping cream + 2tbsp sugar

Instructions:

1. In stand mixer using paddle to mix cream cheese, sugar, zest, and vanilla until smooth and fluffy.

2. Add in mascarpone cheese.  Mix just until combined. Add in lemon curd and yellow color. Mix until fluffy.

3. In a separate bowl whip heavy whipping cream with sugar until stiff.

4. Fold whipped cream with mascarpone cream.

5. Fill in piping bag for filling. Fill another bag for border. Place the filled piping bags in refrigerator for about 20 minutes for it to set.

Limocello Sugar Syrup

1/4 cup water
2 tbsp sugar
2-3 tbsp limoncello (can replace with some lemon juice)

Bring water and sugar to boil until sugar dissolves. Cool and add in limoncello.

Assemble Cake

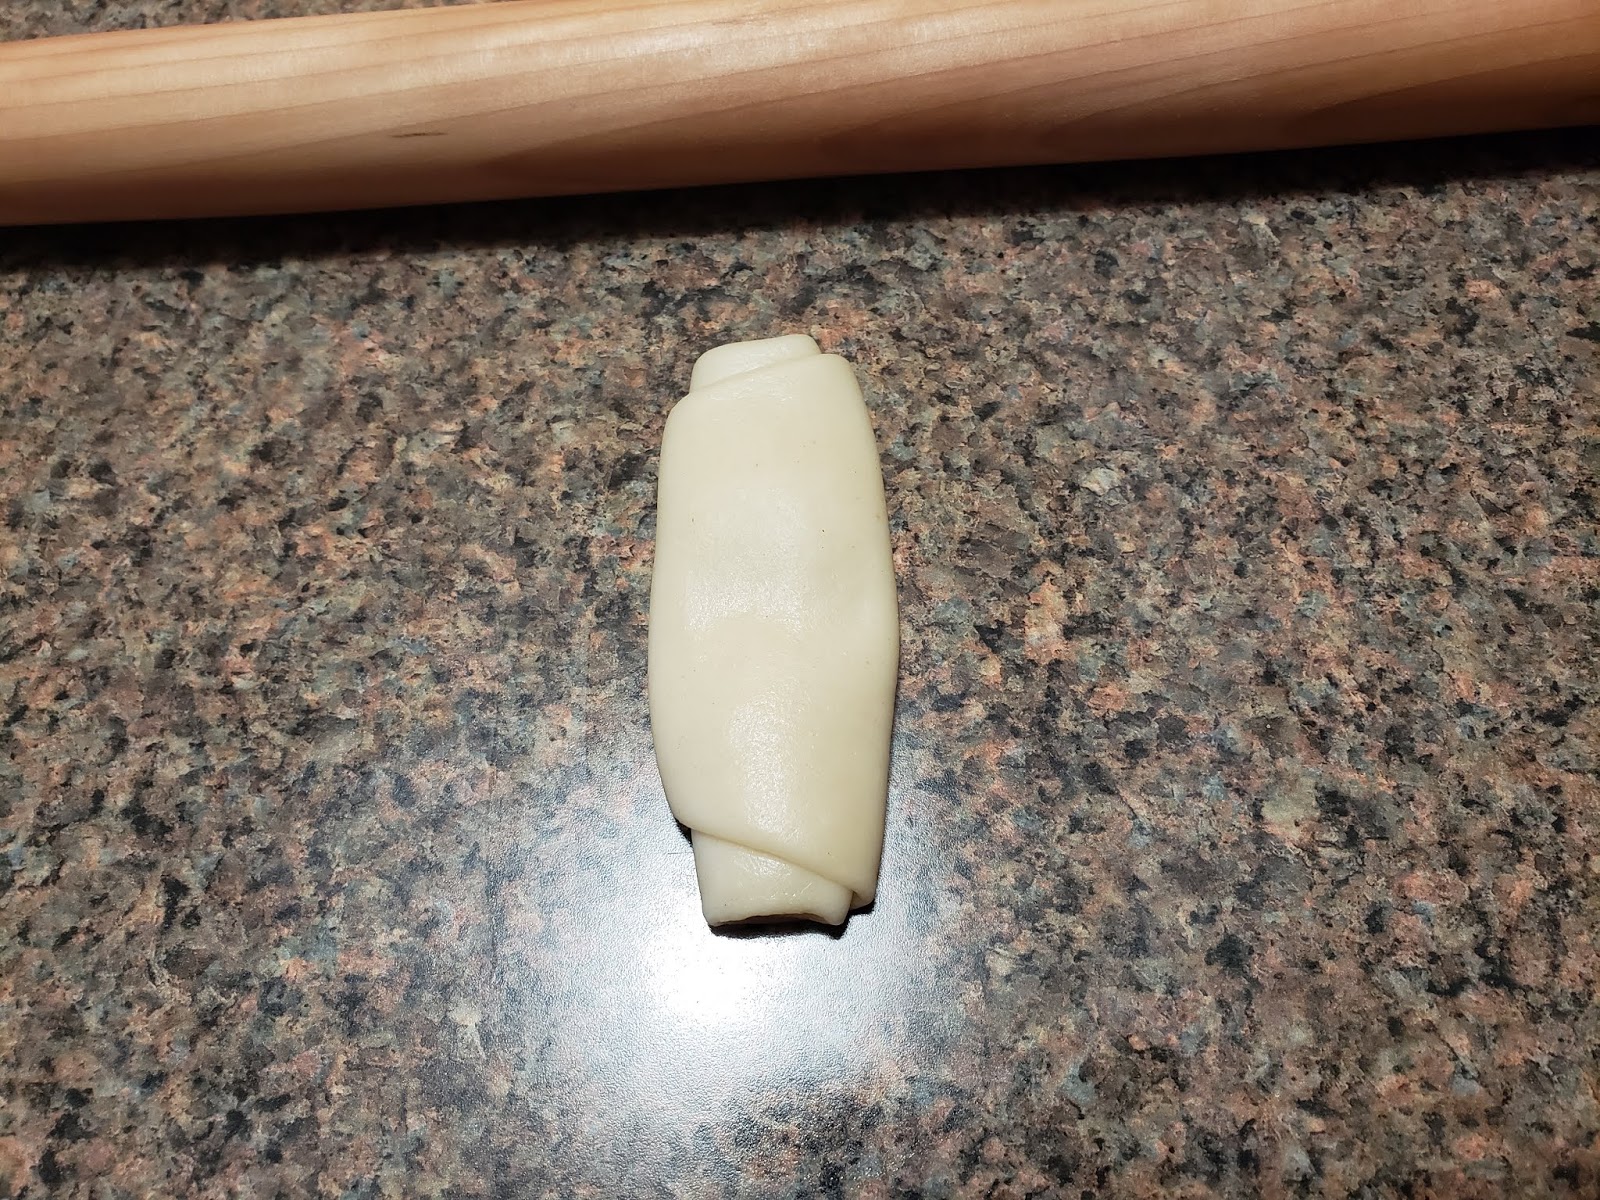
1. Slice cakes into 4 even pieces. Brush with limoncello syrup.

2. Fill the cake with mascarpone cream. Place another layer of cake on top. Brush with syrup.  Continue with rest of cakes.

3. After fillings then frost whole cake and add borders.

4. Grate white chocolate on top of cake or make chantyflex cream for flowers.

5. Chill cake in refrigerator for 2-4 hours or overnight before serving. Before serving, leave cake at room temperature for about 30 minutes for best texture.

Chantyflex Cream by➡️ GG Cakcraft

100 g chantyflex cream
1-2 tbsp lemon curd
1 drop yellow color (or lemon paste)

Whip all ingredients until well combined.  Place into piping bag with tip and pipe desire flowers.

Sunday, April 14, 2019

Tofu Fa/Douhua/Soybean Custard using GDL

I love to eat soybean custard tofu fa! So far I know there is three ways to make this custard. One using gypsum. Two using glucono delta lactone GDL. Three using gelatin but need to eat cold. I've used gypsum and gelatin method before so now trying GDL method. This is my first time and it is a success! Silky smooth and delicious. I only make a small amount as it's easier and faster to cook and clean. Plus, fresh is better too. 😋😋😋


This is the GDL I bought from Amazon.com
Cover the whole bowl with another towel
Use lid wrapped with cloth to prevent moisture dripping in.
Add GDL and water to bowl. Swirl mixture until dissolves and coat all sides of bowl.


Ingredients:

110 g soybean soaked overnight or 6-8hrs
1030 ml water

1/2 tsp Glucono Delta Lactone
2 tsp water

Instructions:

1. Blend some of the water with soaked soybean. Then mix in the rest of water. Strain soy milk with a cloth and squeeze out all the milk. (I got about 1078 ml milk)

2. Pour strained soy milk in a pot and bring to boil. Stir occasionally to prevent burning and overflow.  After milk boiled,  bring heat lower and let simmer for a few more minutes. Remember to stir. Then turn off heat. Skim off foam

3. Prepare a clean oil free bowl. Add in the 1/2 tsp GDL and 2 tsp water. Swirl the mixture in bowl until GDL dissolves and coat the whole bowl to the top with the mixture. (Mixture must use right away as it will lose effectiveness if leave too long after mixing.)

4. By now you'll see soybean skin. Remove it. Pour the hot soy milk all in from about 1 foot high into bowl. Quickly and gently scoop out foam.  Cover the bowl with lid wrap in cloth to prevent moisture dripping into custard.

5. Use another 1-2 towels to cover the whole bowl to incubate it. Leave untouch for about least 1 hr for custard to set.

6. Serve with your favorite syrup.

Enjoy!

Ginger Syrup:

150 g palm sugar or brown rock sugar
3/4 cup water
15-25 g Sliced  ginger (more less to taste)

Bring sugar and water to boil. Then add in ginger. Continue to boil until slightly thicken.

Tips:
1. Remove soy bean skin after soaking for a whiter custard.
2. Bowl needs to be clean and oil free.
3. Need to coat the whole bowl with GDL mixture.
4. Do not try to move bowl after pouring in soy milk. Must cover and incubate for 40 minutes to 1 hr for custard to set.
5. Never use more GDL as too much can cause sour taste.
6. After cooking soy milk, leave for about 5 minutes before pouring into GDL mixture.

Friday, April 12, 2019

Wife Cake- Lau Po Ping 老婆饼

Wife cake made by the wife! 老婆饼 
I ran out of regular sesame so replaced with some black sesame. These are so crispy and chewy at the same time. Just love the crunch of the candied winter melon too. Flaky crust, chewy filling....I love! So yummy!😋😋😋


Repeat. Flatten and roll into oblong shape.
Use water dough to wrap oil dough. Roll into oblong shape. Roll it from one end to the other end.


Increased filling➡️ Recipe

Makes 16 cakes 
Recipe by Chef Zhu Limi Foodvideo

Water Dough:

200g all purpose flour
10g maltose
60g lard
110g hot water (used boiling hot)

Use flour make a well, place lard and maltose in center. Slowly add in the hot water and knead together.  Hot water helps melt maltose and lard into flour. Use rub and pull method to make dough elastic. Throw dough on counter a couple times to help develop gluten. Cover let it rest for about 20 minutes.

Oil Dough:

120g all purpose flour
60g lard

Use hand knead flour and lard into dough.

Filling:

80g fried glutinous rice flour gaofun
30g sugar
110g water
13g lard (can sub with 1 tbsp vegetable oil)
85g candied winter melon chopped (used 100g)
30g sesame seeds (lightly roast half black/white)
15g desiccated coconut

Heat a pan. Add in water, sugar and oil. Turn on low or off once it boiled. Add in flour and mix well with the water. (Add in little more water if too dry) Then add in sesame, coconut and chopped candied melon. Mix well. Leave to cool and divide into 16 about 20-22g each.

Method:

Use water dough and wrap the oil dough. Flatten. Roll it thin and evenly into an oblong shape like pictures above. Then roll it up from long side to the other end. Repeat one more time. Rolling it will give layers for crust. (See video)

Bend the two ends to center and then flatten to roll it into flat circle to wrap filling. Then use rolling pin to flatten into flat round shape biscuit.

Use sharp knife to cut 2-3 lines in center all the way through. Brush with egg wash (1 egg beaten).  Add some sesame seeds for decoration.

Bake in preheated oven at 390F or 200C for about 20 minutes until golden.

Let cool before serving. Extremely crispy crumbly when hot!

Thursday, April 11, 2019

Banana Tapioca Pudding- Che Chuoi

Bought some Asian bananas because I was craving for some banana tapioca pudding.  The bananas were only slightly yellow when I bought them. I let them sit on the counter for a week until very ripe to cook them for max sweetness. The good thing about these Asian bananas is even if skin is somewhat black, the inside is still very good and not mushy.


Let bananas continue to ripe another 2-3 days for max sweetness


Ingredients:

10-12 ripe Asian bananas
1/2 cup sugar (sweeter add 2 tbsp)
1/2 tsp salt
2 cans coconut milk (14 oz each)
2 cup water
1/3 cup tapioca
1 tbsp sweet potato starch+ 1/3 cup water

Instructions:

1. Cut your bananas lengthwise into 3 pieces each bananas.

2. Marinate bananas with sugar and salt for about 15-20 minutes.

3. Bring 2 cup water to boil. Add in tapioca and let it boil for 3 minutes.

4. Add in coconut milk and bring to simmer. Add in marinated bananas.  Stir and bring to simmering boil. Taste add in more sugar if needed.

5. Stir in starch water and stir until thicken. Remove from heat to cool and let tapioca to fully expand before serving about 15-20 minutes.

6. Serve warm or cold. Garnish with toasted peanut and sesame seeds.

Enjoy!

***Best to eat same day it's made. Store leftover in refrigerator.  Can eat cold or warm in microwave before eating.

Sunday, April 7, 2019

Washington, D.C. Cherry Blossoms 2019

Today we took kids to see cherry blossoms at Washington, D.C. for some beautiful pictures. Last year we went a week early so some flowers didn't bloom yet. This year we are at the right timing! I think if we wait another week most flowers will be gone. Afterward we went to Eden Center at Falls Church for food and delicious fried tofu! I'm so dead tired...lol😴


Saturday, April 6, 2019

Pan-Fried Pork Buns/ Sheng Jian Bao

One of my favorite is pan-fried pork buns! Why? I get soft, fluffy, savory, and crispy at the same time! You know how delicious it is when your kids fight for the last one! My 2 year old is the smartest as he eats all the fillings and leave you the bun.🙄🤣

These goes straight to pan to fry with some oil and water just like potstickers.  Except I also added some flour to the water to create a crispy frost flower crust. Love the scallions as it makes everything smell so nice. You can eat these buns by itself as filling is savory and juicy. Or you can dip in your favorite dumpling sauce like eating dim sum!😋😋😋


Done frying when water evaporated and buns are crispy on bottom.
Open lid after 5-6 minutes. Add in scallions and sesame seeds and continue to fry
Arrange buns in 12 inch pan with oil. Leave some space for buns to expand.
If you're like me who never able to produce same size bun each time then draw a circle place under silicone mat as guide.😆


Filling:
Makes 28-30 buns, 1 tbsp 22-25g each

540 g ground pork
2 tsp light soy sauce
2 tsp oyster sauce
1/4 tsp salt
1/8 tsp ground pepper
1 tsp sugar
1 tsp sesame oil
2 tsp vegetable oil
3 stalks chopped scallions
1 tsp grated ginger
1 tsp shaoxing rice wine
1 tsp chicken powder
1 tsp tapioca starch/cornstarch
Pinch of five spice powder
4 tbsp water

Mix all seasonings together with pork except for water. Stirring within one direction until well combined and slowly add in water.  Continue to stir until meat absorbed all water. Cover and refrigerate.

For dough: makes 14 buns 30g each. Or 15 buns 28g each. Reasons to only do half recipe because couldn't eat all in one go and didn't want dough over proof. You can double dough recipe to finish filling. Double everything but use only 1.5 tsp yeast.

225 g all purpose flour
25 g cornstarch
90 g warm water
30-35 g whole milk
30 g sugar
1 tsp yeast
20 g vegetable oil

1. Mix yeast with warm water and 1 tsp sugar for about 5 minutes until foamy.

2. Mix all ingredients into electric mixer to knead dough for 8 minutes until smooth and elastic. (Add more flour if too wet, more water if too dry)

3. Oil bowl and dough surface. Cover and rest dough for 20-30 minutes.

4. Knead dough and divide into 14 pieces about 30g each. Knead into round balls. Must cover dough with moist cloth to prevent drying.

5. After kneading all into round balls, then roll first dough into wrapper about 9 cm circle. (Easier to roll if add flour to surface.)

6. Place 1 tbsp meat filling into wrapper and pleat into bun. Repeat until done. Cover with moist cloth for 10 minutes before frying.

Assemble for frying: need 200 ml water + 3/4 tbsp all purpose flour, chopped scallions and toasted sesame seeds

1. Place pan on stove and add in 1 tbsp oil. Start fire. Arrange buns into pan. Fry for 1-2 minutes until bottom bun is slightly golden. (Can rearrange buns as center buns usually brown first.)

2. Add in flour water, let it boil up for 1-2 minutes then cover with lid. Heat should be medium high for 5-6 minutes.

3. Open lids, lower heat to medium. Add in 2 stalks chopped scallions and toasted sesame seeds.  Continue to let buns fry on medium heat until all water evaporate and buns crispy about 9 minutes. (Need to adjust heat so not to burn buns.)

4. Remove to plate. Serve hot with or without dumpling sauce.

Enjoy!


Cover dough with moist cloth