Sunday, December 27, 2009

Sweetheart Lychee Blooming- December 2009

What an exciting year this is. The lychee bloom spikes started mid November. There are a lot of bloom spikes for my 6 ft tall sweetheart lychee! It was disappointing at first since there were only female flowers and no male flower at all. Female flowers bloomed on December 14 and not until December 27 where I got some male flowers. I think there are only 10% of male flowers. It's not easy to pollinate these flowers. A brush will not work since there are some nectar around the flowers causing the brush to get very sticky. So what I did was to collect some male flowers with my tweezer and then use the tweezer to clip the male flowers and brush it on the fresh female flowers. Cross my fingers and hope I will get some fruits. I will continue to do this pollination for the next few days until all my flowers are gone.

December 1. Still just bloom spikes.

12-14. Some female bloomed.

12-18. Still just female flowers.

12-21. More female flowers

12-15. More female flowers

12-25. The bloomed female ovaries are larger.


12-27. Finally some male flowers!!!

Here are a lot of female flowers without pollination since there was no male flower. Somehow the ovaries still swell up. We will see if these will fall off later or not.


Me trying to pollinate with my tweezer...lol


Thursday, December 24, 2009

Flaky Taro Mooncake Pastry

I just had a feeling of wanting to eat some puff pastry. So I went and google some recipes for flaky pastry. There are some recipes for yam pastry but I only have taro. So I decided to make my own taro pastry. The truth is I've never eat this pastry before. I think they do sell them as mooncakes but never had a chance to taste these. The result is very good...except the color was gone after I fried the pastry! I need to bake them next time instead of frying. I think this is also good if I make a salty fillings. Got the dough recipe from auntyochana blog. Sure will make these again next time.


Fillings:

500 gm steamed and mashed taro
145 gm sugar
1 cup water
4 tbsp all purpose flour

Method:

1. In a pot heat the water and sugar together. You can add a little purple to give the filling a darker color. Then add in the mashed taro.
2. Stir well and then turn heat low. Taste and if you need to add more sugar then add more. Now slowly add in one tablespoon of flour at a time until the mixture is thicken but not so thick that you can't stir.
3. Remove from heat and let it cool down before forming balls. After cooling the taro will be harder and easier to shape. Make 16 balls then place them in the refrigerator to continue cooling. (Note: If it's too sticky then use some flour on hands before handling the taro.)

Water Dough:

200 gm all purpose flour
1/2 tsp white vinegar
50 gm shortening
30 gm sugar
100 gm water

Oil Dough:

180 gm all purpose flour
100 gm shortening

Method:

1. For water dough, mix water, sugar, and vinegar. Mix to flour and add in shortening. Knead to a soft dough. Let rest for 20 mins. Divide into 4.
2. Knead flour and shortening together for oil dough. Divide into 4 parts.
3. Know flatten the water dough and place the oil dough in the middle. (see pics below). Roll it out and then fold and roll out again. Then roll it into a swissroll and cut into 4 pieces. Repeat for the rest of the dough.
4. Flatten each piece of dough and you will see the spiral. Place the taro ball in the middle of the dough and wrap it. Remember the pretty side on the outside so when you fry you can see the spiral.
5. Heat oil and fry until golden. It should only be two to three minutes since we do not need to heat the filling. Only need the dough to cook.


Thursday, December 17, 2009

Sago Dumpling w/ Mung Bean (Che Bot Bang)

Here is another Vietnamese dessert which my hubby loves to eat. He can eat four of these at one sitting. And he wanted more the next day. This must be really good...lol. I had some left over mung bean from my fried glutinous rice balls so I decided to make this good dessert. Remember to cut this recipe in half if serving for less than 4 people...:)


Ingredients:

2 cups of green tapioca pearls (soak in water for 1 hr or more)
4 tbsp tapioca starch
4 tbsp sugar
1/2 tsp pandan paste

1 can 19 oz coconut cream
1/4 cup sugar
1/2 tsp salt
1/2 cup water
1 tbsp tapioca starch

Filling:

200 grams hulled mung bean
1/4 cup+ 1 tbsp sugar
3 tbsp all purpose flour

Method:

1. Cook the mung bean with some water until tender. Remove excessive water and continue to cook until very soft. Take the mung bean out and use a potato rice to mash the mung bean.
2. Place the mung bean back in the pot and add in sugar. Mix well and continue to cook until dry. Slowly add in the all purpose flour until the mixture is thicker. Remove from heat and let cool.
3. While still warm, rub your hands with some flour and make the mung bean paste into small balls. It should be a size of half an egg or as small as you want. Let the mung bean balls to cool and place in refrigerator.

4. Drain soaked tapioca pearls and add in the tapioca starch, sugar, pandan paste. Mix together gently.
5. Oil some small bowls and place some tapioca pearls into the bowl. Then place the mung bean in the middle. Add some more tapioca pearls to cover the mung bean (see below). Just add enough and not too much.
6. Steam for 8 minutes or until the tapioca is translucent. Do not over cook this!

7. Heat a pot and add in the water, coconut cream, sugar, salt. Bring to slow boil and taste. Add more sugar if necessary. In a bowl add in tapioca starch and 3 tbsp water. Slowly add this mixture into the coconut sauce to thicken it. Remove from heat.

8. Now scoop the sago dumplings into the coconut soup. (Note: if you know you could not finish the dessert then do not add all of the sago dumplings into the soup. You can always make more coconut milk for the sago dumplings later.)

9. Serve with some roasted sesame.


Tuesday, December 15, 2009

Fried Glutinous Rice Balls (Banh Cam & Banh Ran)

I've been wanting to make my own fried glutinous rice balls. I was actually craving for the one with syrup on it. The rice balls is like $0.75 each at the store....guess it's a lot cheaper to make my own. These taste pretty good. Crispy on the outside and chewy on the inside. The sweetness is just perfect. My first time making this snack too! Yummy yummy.....


Ingredients:

3 cup glutinous rice flour
1/4 cup rice flour
1 cup mashed yam (about 125 grm)
250 ml water
65 grams sugar (about 5 tbsp)
1 tsp baking powder
Sesame

Filling:

200 grams hulled mung bean
1/4 cup + 1 tbsp sugar
3 tbsp all purpose flour


Method:

1. Cook the mung bean with some water until tender. Remove excessive water and continue to cook until very soft. Take the mung bean out and use a potato rice to mash the mung bean.
2. Place the mung bean back in the pot and add in sugar. Mix well and continue to cook until dry. Slowly add in the all purpose flour until the mixture is thicker. Remove from heat and let cool.
3. While still warm, rub your hands with some flour and make the mung bean paste into small balls. It should be a size of half an egg or as small as you want. Let the mung bean balls to cool and place in refrigerator.

4. Mix the glutinous, rice flour, baking powder, and mash sweet potato together. Mix sugar in water and stir well. Then mix water with flour. Knead into a dough. (I used the bread maker to help me knead). Leave dough to rest for 2 hrs.

5. The dough should be soft but not wet to handle. Divide the dough into balls double the size of the mung bean ball.
6. Flatten the dough (see pic below) and place the mung bean in the middle. Wrap it up and roll it in the palm into a round ball. Then roll it on the sesame. Remember the skin should not be too thick.
7. Heat enough oil to to cover at least halve the rice balls. The heat should be medium and fry the rice balls slowly. With the heat on medium, the dough can slowly expand and not explode. Fry until fluffy and golden brown.

(Note: It'll be crispy while still warm. When the glutinous rice balls get soft, you can heat it in the oven and it will by crispy again.) You will have some mung bean balls left. You can save this and make more dough for it the next day or make sticky rice dumpling with it.

Monday, December 14, 2009

Sweet Mung Bean Soup w/ Coconut Cream (Che Tao Xon)

Time for more dessert again. This is a Vietnamese dessert. If you love mung bean then this is the dessert for you. For Vietnamese, almost every dessert eats with coconut milk. This is a big pot of dessert that you can eat for two days or maybe three if it's just you and another person. I think this pot can serve at least 6 people. Reduce the amount if you're just planning for two people.


Ingredients:

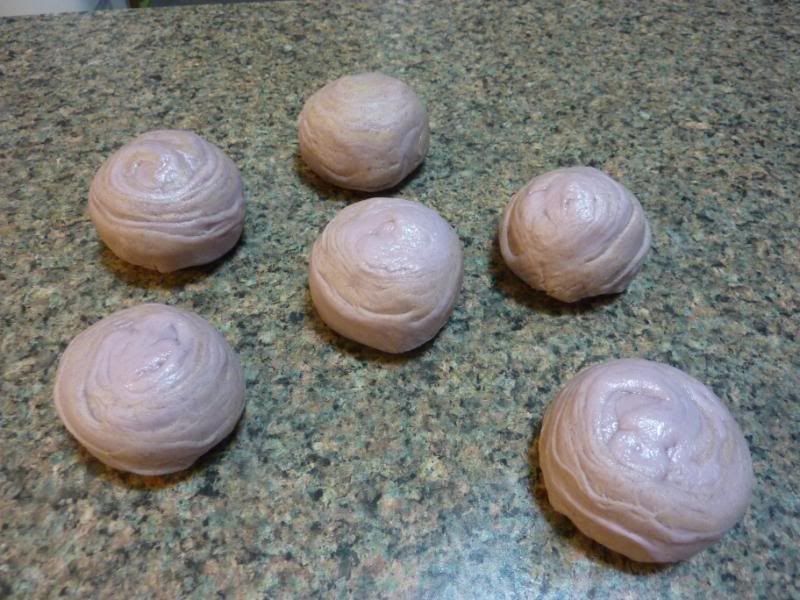
300 grams split hulled mung bean (soaked for overnight or at least 2 hrs)
270 gram rock sugar (use the yellow type)
6 cups water
1 tsp yellow coloring (just about)
7 tbsp tapioca starch
1/2 cup water

Coconut Sauce:

1 can 19 oz coconut cream
1/2 cup water
2 tbsp sugar
1/2 tsp salt
1 tbsp tapioca starch
1/4 cup water

Method:

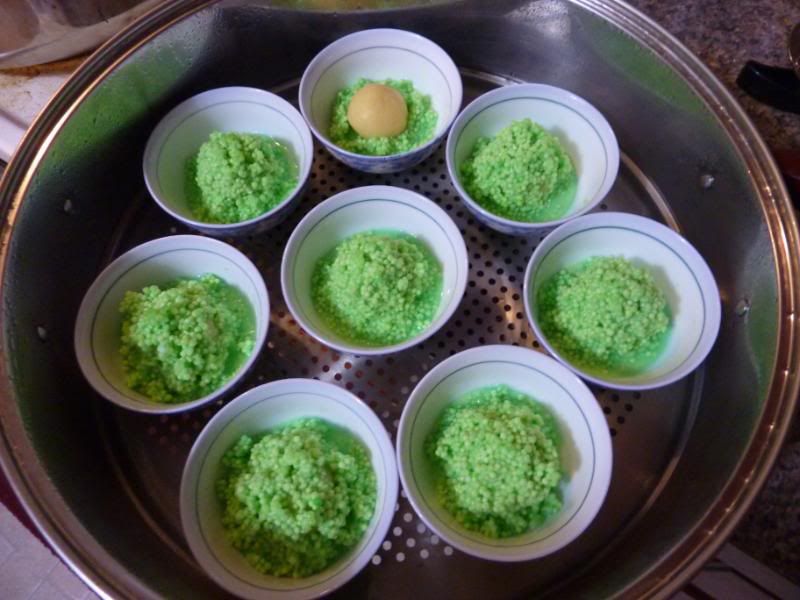
1. Drain soaked mung bean and steam over cheese clog until soft but not mushy. Maybe 20-30 minutes is enough. The mung bean should still hold it's shape.

2. Boil 6 cups of water. Add in the rock sugar and stir. When rock sugar melt, add in the yellow food color and stir. It should be light yellow but not too light.

3. Now mix 1/2 cup water with 7 tbsp tapioca starch and set aside to use later.

4. While the sugar water is boiling, pour in the steamed mung bean slowly. Us the chopsticks to stir gently.

5. Now stir your tapioca mixture and pour it in slowly and the other hand should keep on stirring the mung bean soup. Reason for not pouring in all at once is because we do not want chunks of tapioca forming. We want the soup to be smooth. Stop pouring in the tapioca mixture once the soup is thicken. We do not want the soup to be too thick or too watery. If the soup is still watery after you pour the whole tapioca mixture in then mixture some more tapioca mixture to add to the soup.

6. Remember to turn off the heat once the soup is thicken. We do not need to cook this any longer since the mung bean is already cooked. We want the mung beans to still have its shape.

7. In a separate pot, mix 1 can (19oz) coconut cream, with 1/2 cup water, 2 tbsp sugar, 1/2 tsp salt and bring to slow boil. Remember to stir. Mix 1 tbsp tapioca starch with 1/4 cup water to thicken the coconut sauce. If you still have the left over starch for the mung bean then use some of that. You do not need to use the whole mixture, just use enough to make the coconut sauce thicken and creamy.

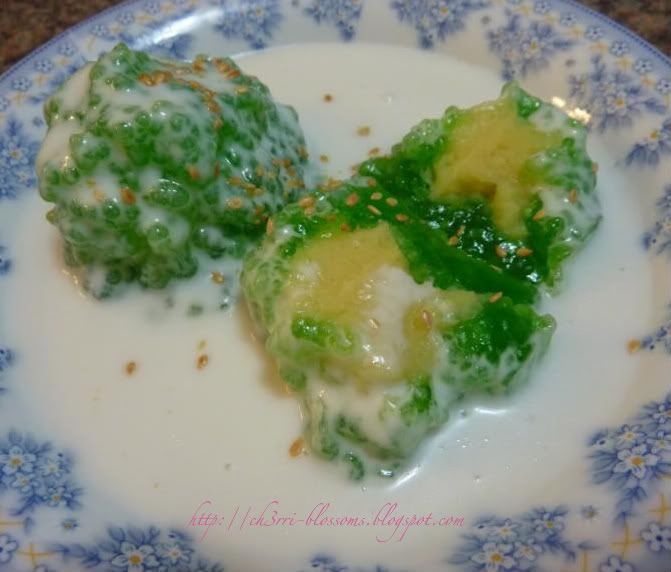
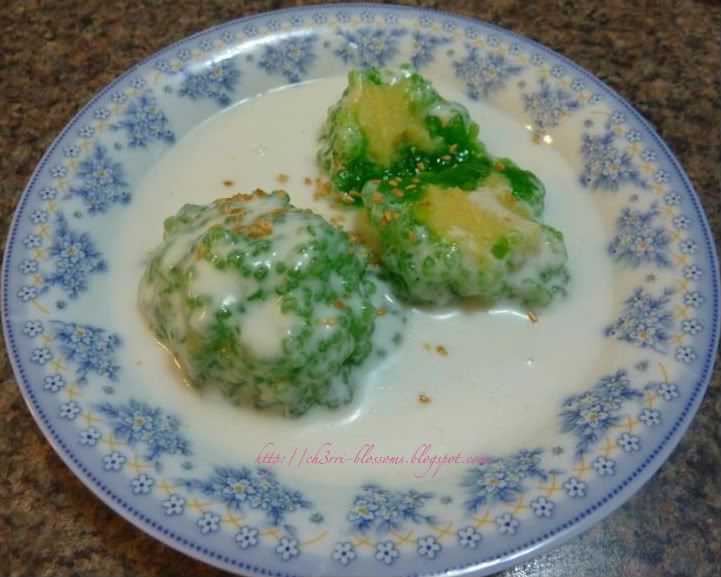
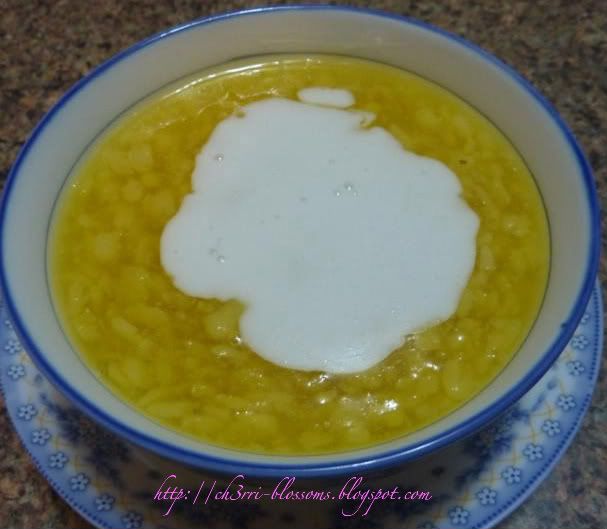
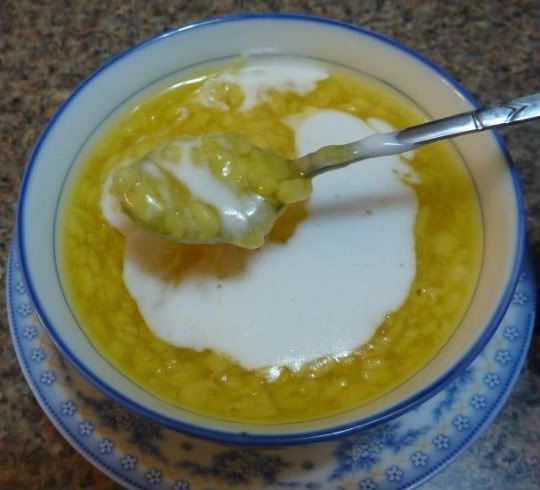
8. To serve, pour some mung bean soup in a bowl and top with lots of coconut sauce.


Of course I add more coconut sauce than this! :)

Friday, December 4, 2009

Time to eat my Priestly Atemoya (Man Cau)

So I picked some more of the fruits on my priestly atemoya two days ago. The fruits are finally ripe and ready to eat. But I think it's more exciting to look at the fruits than to eat it. This tree I got from Top Tropicals is supposed to be Priestly, but now I'm not sure if it's a 48-26 or priestly because the fruit is pinkish. The smell of the fruit is good but not as strong as the sugar apple. The taste is not so sweet...but around the seed around is sweeter. It's also chewy. Guess next year I will fertilize the tree more. I will also change the pot to a larger pot. The two largest weigh around 7.7-8.5 oz.


Thursday, December 3, 2009

2 in 1 Taro/Tapioca Sweet Soup (Che Khoai Mon Khoai Mi)

Feel like eating dessert and I have taro and tapioca at home. So I created this special 2 in 1 combo of taro and tapioca together. It's very interesting because you can taste the flavor of the taro and the chewiness of the tapioca. The tapioca pearl and coconut milk is a great soup for this dessert. Eat it cold and the taro/tapioca is even more chewy.


Ingredients:

1 lb taro
1 1/2 lb grated tapioca (yuca)
1 cup glutinous rice flour
1 cup coconut cream
4 tbsp sugar
1/2 tsp salt
1/3 cup tapioca pearl
4 cup water
1 can 19 oz coconut cream
1 1/4 cup sugar

Method:

1. Chop the taro into chucks and steam it until soft. Approximately 30 minutes.
2. After taro is soft, mash it with a potato ricer or with a big spoon.
3. Mix the mashed taro, grated tapioca, sugar, and salt together.
4. In the cup of coconut cream, mix 6 drop of red and 4 drop of yellow coloring together to make purple. Mix this with the glutinous rice flour into paste and add into the taro/tapioca. Mix well.
5. Heat a pot of water to steam. Oil the pans and steam the cake for 30 minutes.

6. In a pot heat some water to cook tapioca pearl. Cook it until it's somewhat translucent and strain.
7. In a pot boil 4 cup water and add in the coconut cream. Add in the cooked tapioca pearl and sugar. Put it on simmer.
8. Cut the taro/tapioca cake and drop each piece into the coconut soup. The soup is finish after adding the taro into the soup. *Do not cut the cake too small as it will be mushy.

Note: This soup will become thicken once it's cool. Cook another can of coconut milk with water and some sugar to add into the soup. Once you cook this again the next day it tastes even better. Very creamy and have the taro aroma.

Wednesday, December 2, 2009

Homemade Chinese Knife Shave Noodles (Dao Xiao Mian)

Today I made the famous Chinese Dao Xiao Mian, which means knife shave noodles. This is a very popular noodle where you use a knife to shave the dough into thin flat noodles and into the hot water. I have never eat this noodle before but saw this in movies and everyone seem to say it's good. So I got to try it for myself since it's hard to find a Chinese restaurant that sell this. It's actually not too hard with the knife I got back from China. I think if you have a thin sharp knife you can do it. Or you can roll it out flat and then cut it into thin flat strips. The noodle is good and chewy. This soup I just made it to eat with this noodle. Not sure how the original soup taste like. A great success today and will make this again in the future.


Ingredients: Dough

3 cup all purpose flour
1 cup rice flour
1 tsp baking powder
about 2 cup water
1 tsp salt

Method:

1. Mix everything together and knead into a dough. Knead it for 10-15 minutes. If it's too wet then add a little more flour. The dough should not be too soft. 2. Let it rest for another 15 minutes. (I cheat on this and use the bread maker to knead it for me. Use about 1 2/3 water for this. Just let the machine knead into a smooth dough. Should be 10 minutes or so.)
2. Boil water to shave noodles in. *Wait and do the soup first.

Soup:

1 1/2 lb ground meat
1 cup dried shrimp soaked for an 1 hr or more (use 2 cup water)
10 cup water
6 tsp minced garlic
3 tbsp crab paste

1. Mix the ground meat with 2 tsp oyster sauce, 2 tsp fish sauce, 1/2 tsp salt, 1/2 tsp sugar, 2 tsp oil, 1/2 tsp ground pepper, and 2 tsp of the minced garlic. Mix this well so the meat stick together.
2. In a pot heat 2 tbsp oil. Add in the 2 tsp minced garlic and stir to prevent burn. When turning brown add in the dried shrimps. Do not throw the water away and use it after you stir the shrimp a little.
3. Now add in the water. Let the soup bring to boil then turn fire down to let it simmer.
4. In another pan heat about 2 tbsp oil add in the crab paste. Stir it and then add in the meat. Stir until it is half cook and then add into the soup.
5. Bring the soup to boil and then add in taste. I add in about 2 tsp salt, 3 -4 tsp fish sauce, 2 tsp sugar. Add more fish sauce to taste. Just let the soup simmer while you boil water for the shave noodles.


Serving: Place strained noodles in a bowl and add in some chopped chives. Then add in hot boiling soup.

Baked Tapioca Cake w/ Coconut (Khoai Mi Nuong)

Since I have not eat this for a while I decided to make this and I like it with grated coconut because it gives a more chewy and firmer texture. Plus the added coconut milk really make this a great dessert. I think if the cake is thinner then it will also be chewier. I like the top brown part as it's the chewiest part of the cake. :)


Ingredients:

2 lbs grated tapioca (yuca)
1 1/2 cup grated coconut
1 cup sugar
1 cup coconut cream (try not to shake the can and use only the top part)
2 eggs slightly beaten first
1/4 cup oil
1/2 tsp salt
yellow coloring

Method:
1. Preheat oven at 350F.
2. Mix everything together and add in yellow color.
3. Oil a pan or pans. Remember too thick is not good so 1 to 1 1/2 inch is good enough.
4. Bake the cake for at least 1 hr or more depending on how thick the cake is. Bake until brown. (Usually if the cake is thick then bake for 1 1/2 hr.)
5. Take cake out and let cool completely before cutting.

(Note: If you want a faster baking time then you should microwave the mixture 1 minute a time for about 8 time. This will make the mixture thicken and reduce the baking time by about half.)


***To save time from grating the tapioca, you can purchase the frozen grated tapioca. With this you should drain the excess water if you don't want your cake to be too soft.